


Audio Equipment
Best laptop for music production [2022 Edition]
May 3, 2025
Laptops are so powerful these days that you can produce radio-ready tracks almost anywhere. But there are a few things to consider before yo...
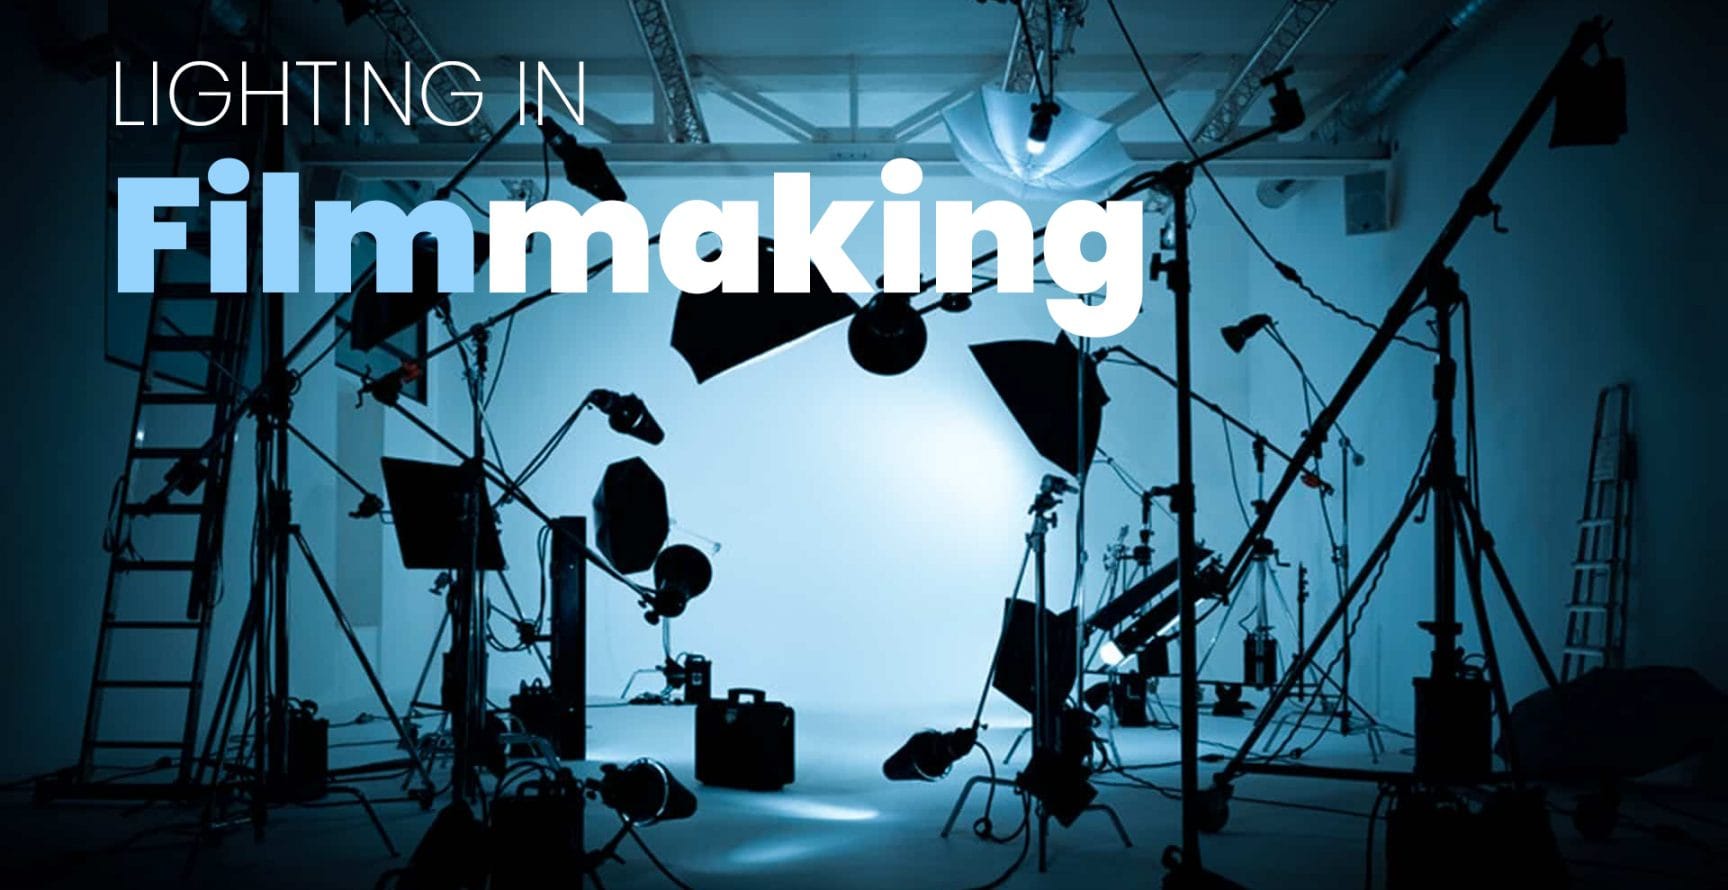
Lighting in filmmaking is undoubtedly one of the trickiest skills to get right. This applies whether you are creating a video for YouTube or for the big screen. We have put together a quick guide that will help you understand the different types of lighting and how to apply them to your work.
Before we get into all of that, let’s think about why we need lighting in the first place.
For the most part, lighting in film is there to make a scene look natural unless it’s for a specific cinematic effect.
The biggest paradox when it comes to lighting in filmmaking is that in order to look natural you need to add considerable artificial light.
As unlikely as that sounds, there is a pretty simple explanation: video camera equipment does not see things like the human eye does.
Natural light creates a massive amount of subtle variation between very light and very dark which the human eye can cope with.
Video, on the other hand, doesn’t cope with that amount of detail in the same way, instead, it creates more extreme contrast.
For example, really dark areas can become black and really light areas can become white and all of the subtle variation/detail is lost.
Artificial light, while it may look overbearing to us, is there to let the video camera see the scene as the human eye does, which in turn gives you a much more natural-looking scene.
In filmmaking, you will hear people talk about three-point lighting as the most commonly utilized lighting setup.
As the name suggests, you have light directed at your subject from three different points to create separation from the background.
Three-point lighting is made up of three different lights, each with different settings to create the desired effect.
The three lights involved are called key light, fill lights, and backlight, let’s take a closer look at each of them.
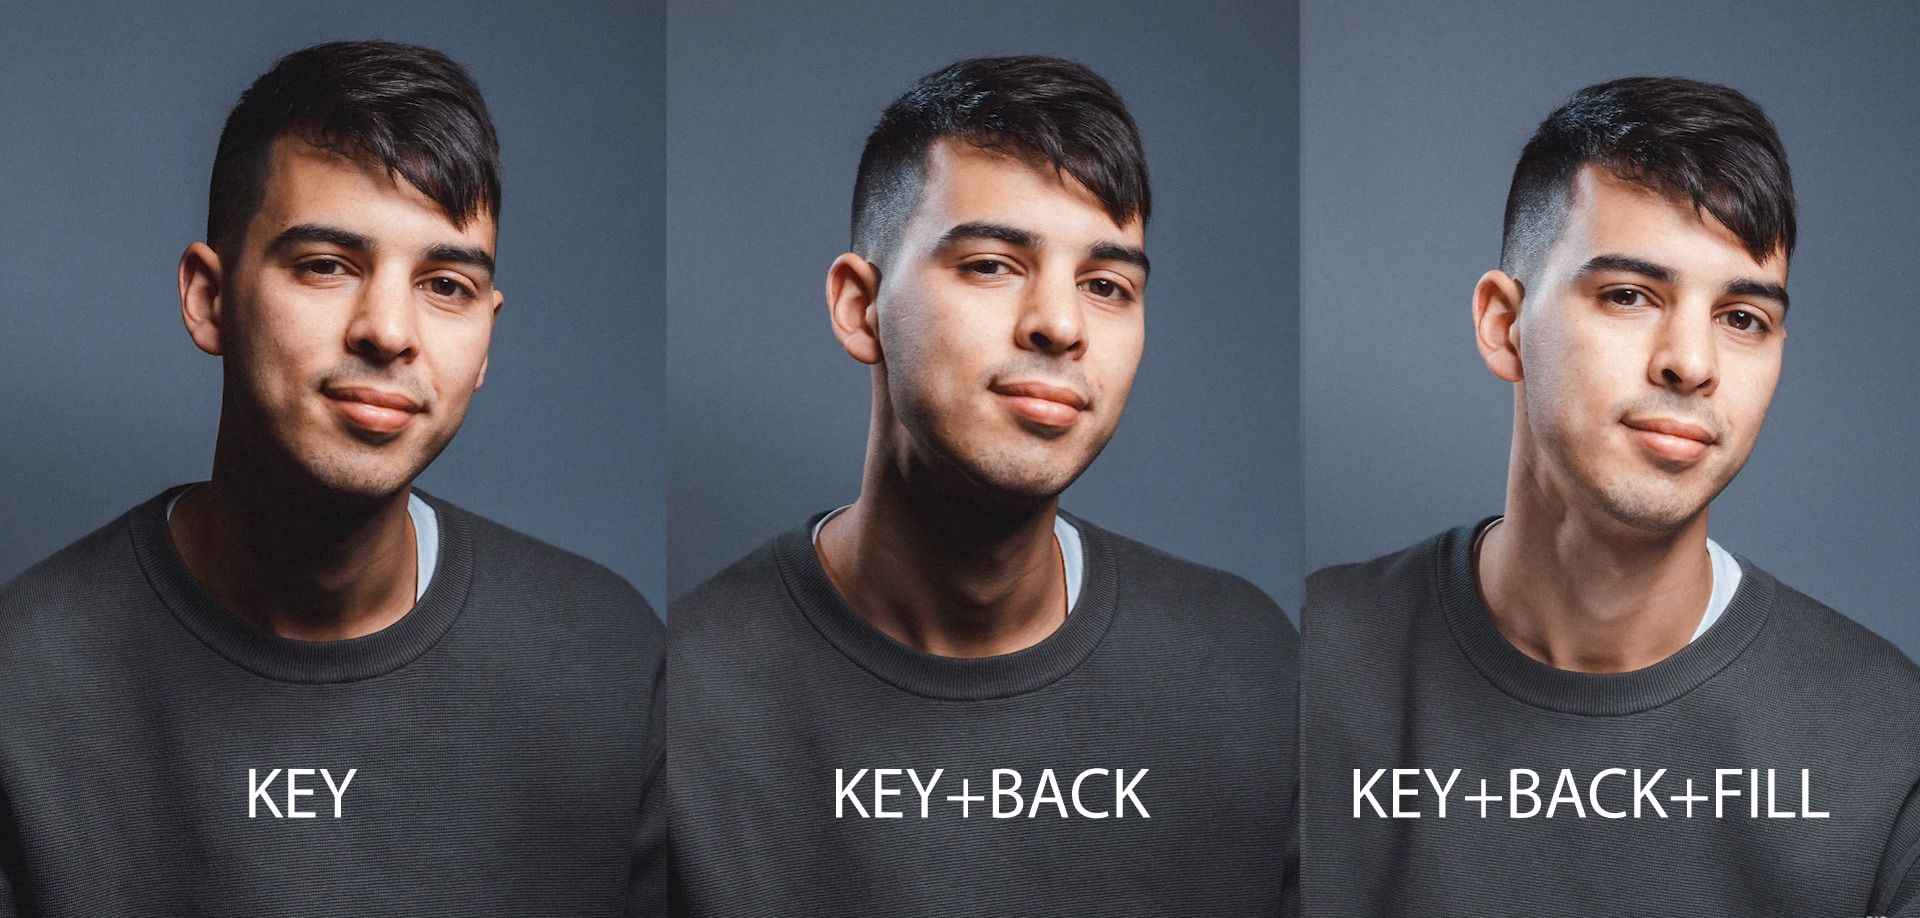
Image courtesy of DIY Photography
This is the main light in the setup. It’s used to illuminate your subject so it’s a more intense light than the other two.
Positioning your key light correctly is paramount because it sets the tone for the entire frame.
Fill lights are used to fill the shadows created by the key light.
Like we mentioned earlier, dark areas in video can turn to black without the correct lighting.
When fill lights are used properly you will still have shadowed areas in the frame but important features will be clearly visible.
Fill lights aren’t usually as intense as key lights and tend to be positioned on the opposite side.
Backlight, as the name suggests, is positioned to hit your subject from behind.
The primary job of the backlight is to create depth in your scene to prevent it from looking two-dimensional.
Obviously, you don’t want a huge light visible in your frame behind your subject so the backlight is usually positioned above the scene at the correct angle.
Knowing what three-point lighting is all about is just the beginning.
If you don’t have a solid grasp of the fundamentals it can all go horribly wrong.
Understanding the role each point plays fully will help you correctly position them to achieve the best lighting ratio.
Light ratio refers to the relationship between the key side (highlight) and the fill side (shadow).
If you have an even balance of light on both sides that would be a lighting ratio of 1.1.
A lighting ratio of 2.1 means the key side is one stop brighter, 4.1 means it’s two stops brighter, and 8.1 means it’s three stops brighter, and so on.
The higher the ratio the more dramatic the shadows will be. Here are some examples:

Getting used to speaking about lighting ratios in this way helps avoid any misinterpretation when describing what you want.
We have now established the most fundamental type of lighting in filmmaking and it’s application.
Making your video look more cinematic is less about being practical with light and more about being creative.
As any filmmaker will know, having the right subject matter isn’t always enough, it’s about how it translates on screen.
If the viewer doesn’t connect with the content the point is lost but there are things you can do to nudge the viewer gently towards the correct emotion.
We will now take a look at the most common cinematic lighting effects, what they are, and when to use them.
So, we know now that the key light is the primary source in three-point lighting but how you set it can have a huge creative impact.
High key lighting is when you increase the intensity of the key light creating a frame with lots of white and light tones.
It will have very little black tones if any, and mid-tones can become white. High key light creates a bright, shadowless scene when combined with lots of fill light.
This type of key light gives an extremely balanced ratio and despite being common in the golden age of Hollywood, these days it’s more often used for product placement/commercials.
Typically used to suggest hope, warmth, optimism, happiness, etc.
Photo by Frank Busch on Unsplash
Low Key is basically the opposite of high key in that it creates lots of shadows and uses little or no fill light.
Instead, this type of lighting focuses on darkness to place atmosphere ahead of the main subject.
This kind of lighting is still widely utilized in thrillers, horrors, fantasy films, etc.
Typically used to suggest mystery, drama, suspense, sad emotions, etc.
Image courtesy of TheFuturePhotographer
Again, as the name suggests, sidelight is directed at the subject from the side.
The main objective of sidelight is to create a dramatic atmosphere where the primary subject is often exaggerated.
This exaggeration comes from harsher contrast between light and dark created by the sidelight.
The extent of the contrast is the creative decision you have to make to get your shot just right.
In order to create that harsher contrast, you will reduce the intensity of the fill light or remove it completely.
Without the fill light enhancing detail in the shadows you are left with a much stronger contrast, less about subtle detail and more about different textures.
This creates a dramatic atmosphere, the feeling of mystery or suspense.
You can find lots of examples of creative sidelight in the film noir genre, like the one below from Nicholas Ray’s In a lonely place.
Film Noir is a wonderful genre to study for many reasons, find out everything you need to know at Filmsite.
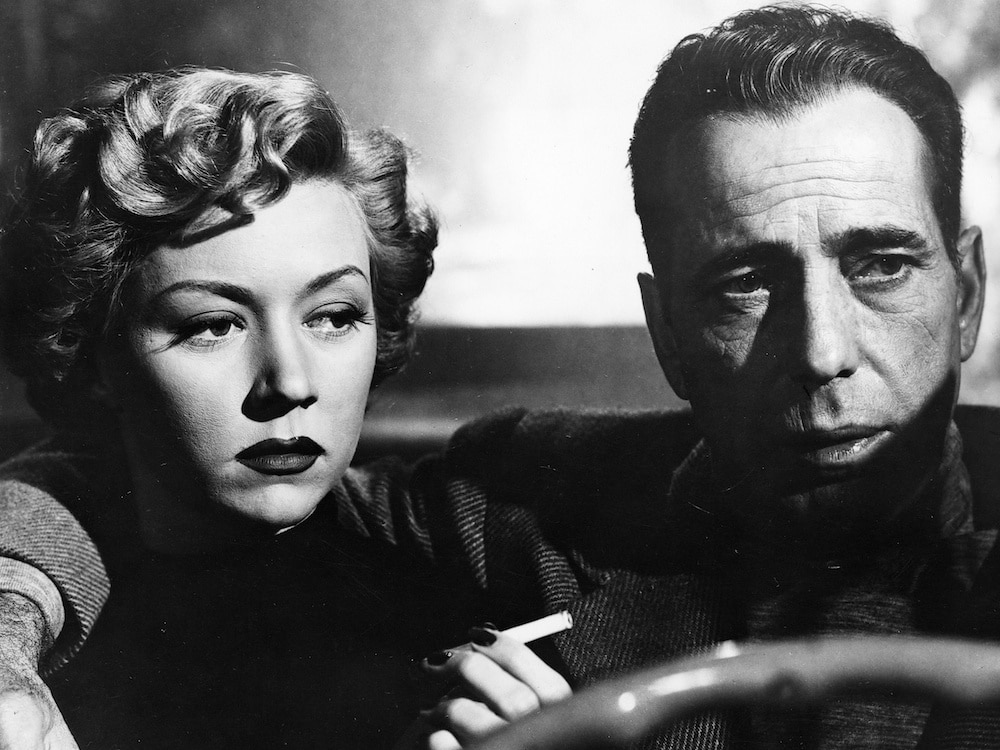
In a lonely place – Image courtesy BFI
Practical light is the most obvious kind because it’s literally in the shot.
When you see a lamp, candle, or any other physical light on screen, that’s an example of practical light.
Apart from illuminating the screen, this kind of light serves another practical purpose by adding more depth to your shot.
Whether it’s illuminating the main subject or another area of the screen, it adds perspective, providing a much fuller scene.
Here are a few examples of practical light in film:

Image courtesy of Universal Pictures
One problem with this kind of lighting is controlling the intensity. The typical household lamp is built to be either on or off, which is why lamps with dimmer switches are often used to get the right balance.
In the example above you can see a cloth handkerchief is placed on top of the lamp to soften the light.
Another way to deal with this issue is by using diffusion gel around the bulb to absorb some of the intensity/brightness.
Diffusion gel can be used in different colors too as a way to change the tone of your frame.
Here’s an interesting example, Stanley Kubrick’s film Barry Lyndon filmed all interior scenes entirely by candlelight to stay true to the era.
If you’re heading down the Kubrick path, and need the perfect suspenseful music, we’ve got you covered.
You can make sure it’s the perfect fit for your film with our exclusive Video Preview tool.
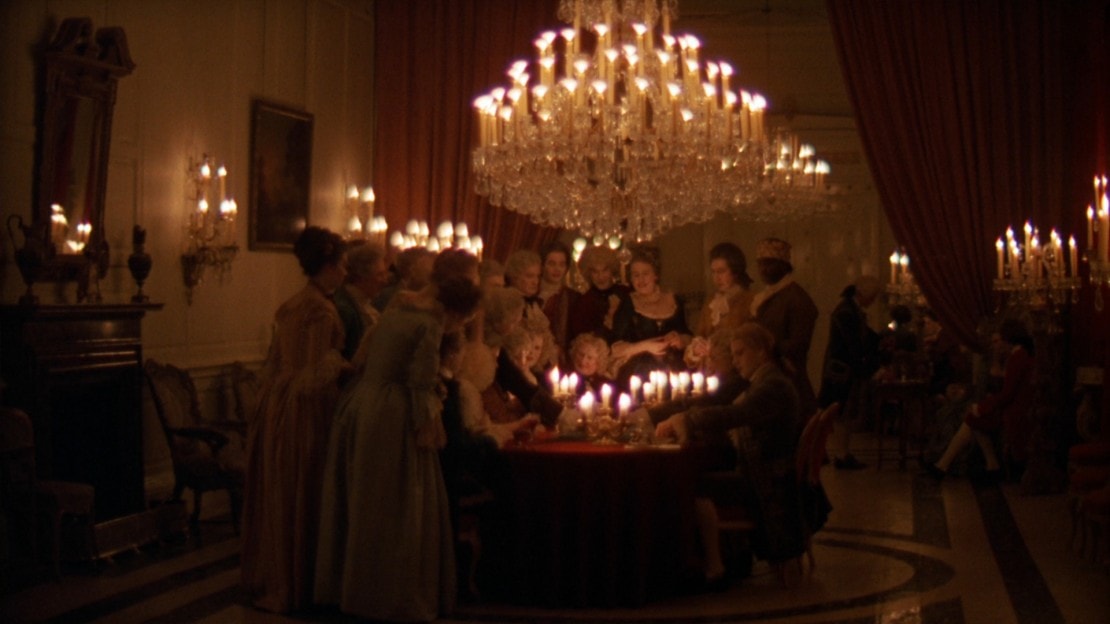
Image courtesy of Warner Bros
This comes in many different forms but in simple terms, it means light reflecting off a surface of some kind.
You can create bounce with any surface that you have access to, walls, floors, ceilings, etc.
Obviously, doing it that way is great for making use of your surroundings but it limits the amount of control you have.
Light reflects differently off different surfaces so as a way to control the intensity there are some tools of the trade that can help.
Foam boards are a cheap and commonly used tool for reflecting light.
Due to their dense, matte texture, they absorb much of the light’s intensity and provide a soft light reflection which can be used in many ways.
Check out this video for a few handy tips on using foam boards:
Much more reflective materials like silver foil, etc, produce a harder light reflection.
In fact, the light maintains so much of its original intensity that it can even be used as a key light, fill, or backlight.
This doesn’t really refer to a particular type of lighting but rather the size and intensity of the light source.
Soft light comes from a bigger source with wider coverage and creates less shadow.
Hard light comes from a smaller source with a more directional coverage, when the light is focused on a smaller area it creates much harsher shadows.
In contradiction to the above statement, direct sunlight produces a hard light with harsh shadows and I guess the sun is a pretty big source of light right? Anyway….
Soft light is perfect when you want little or no shadow at all, for scenes that generally have more gentle, relaxed content.
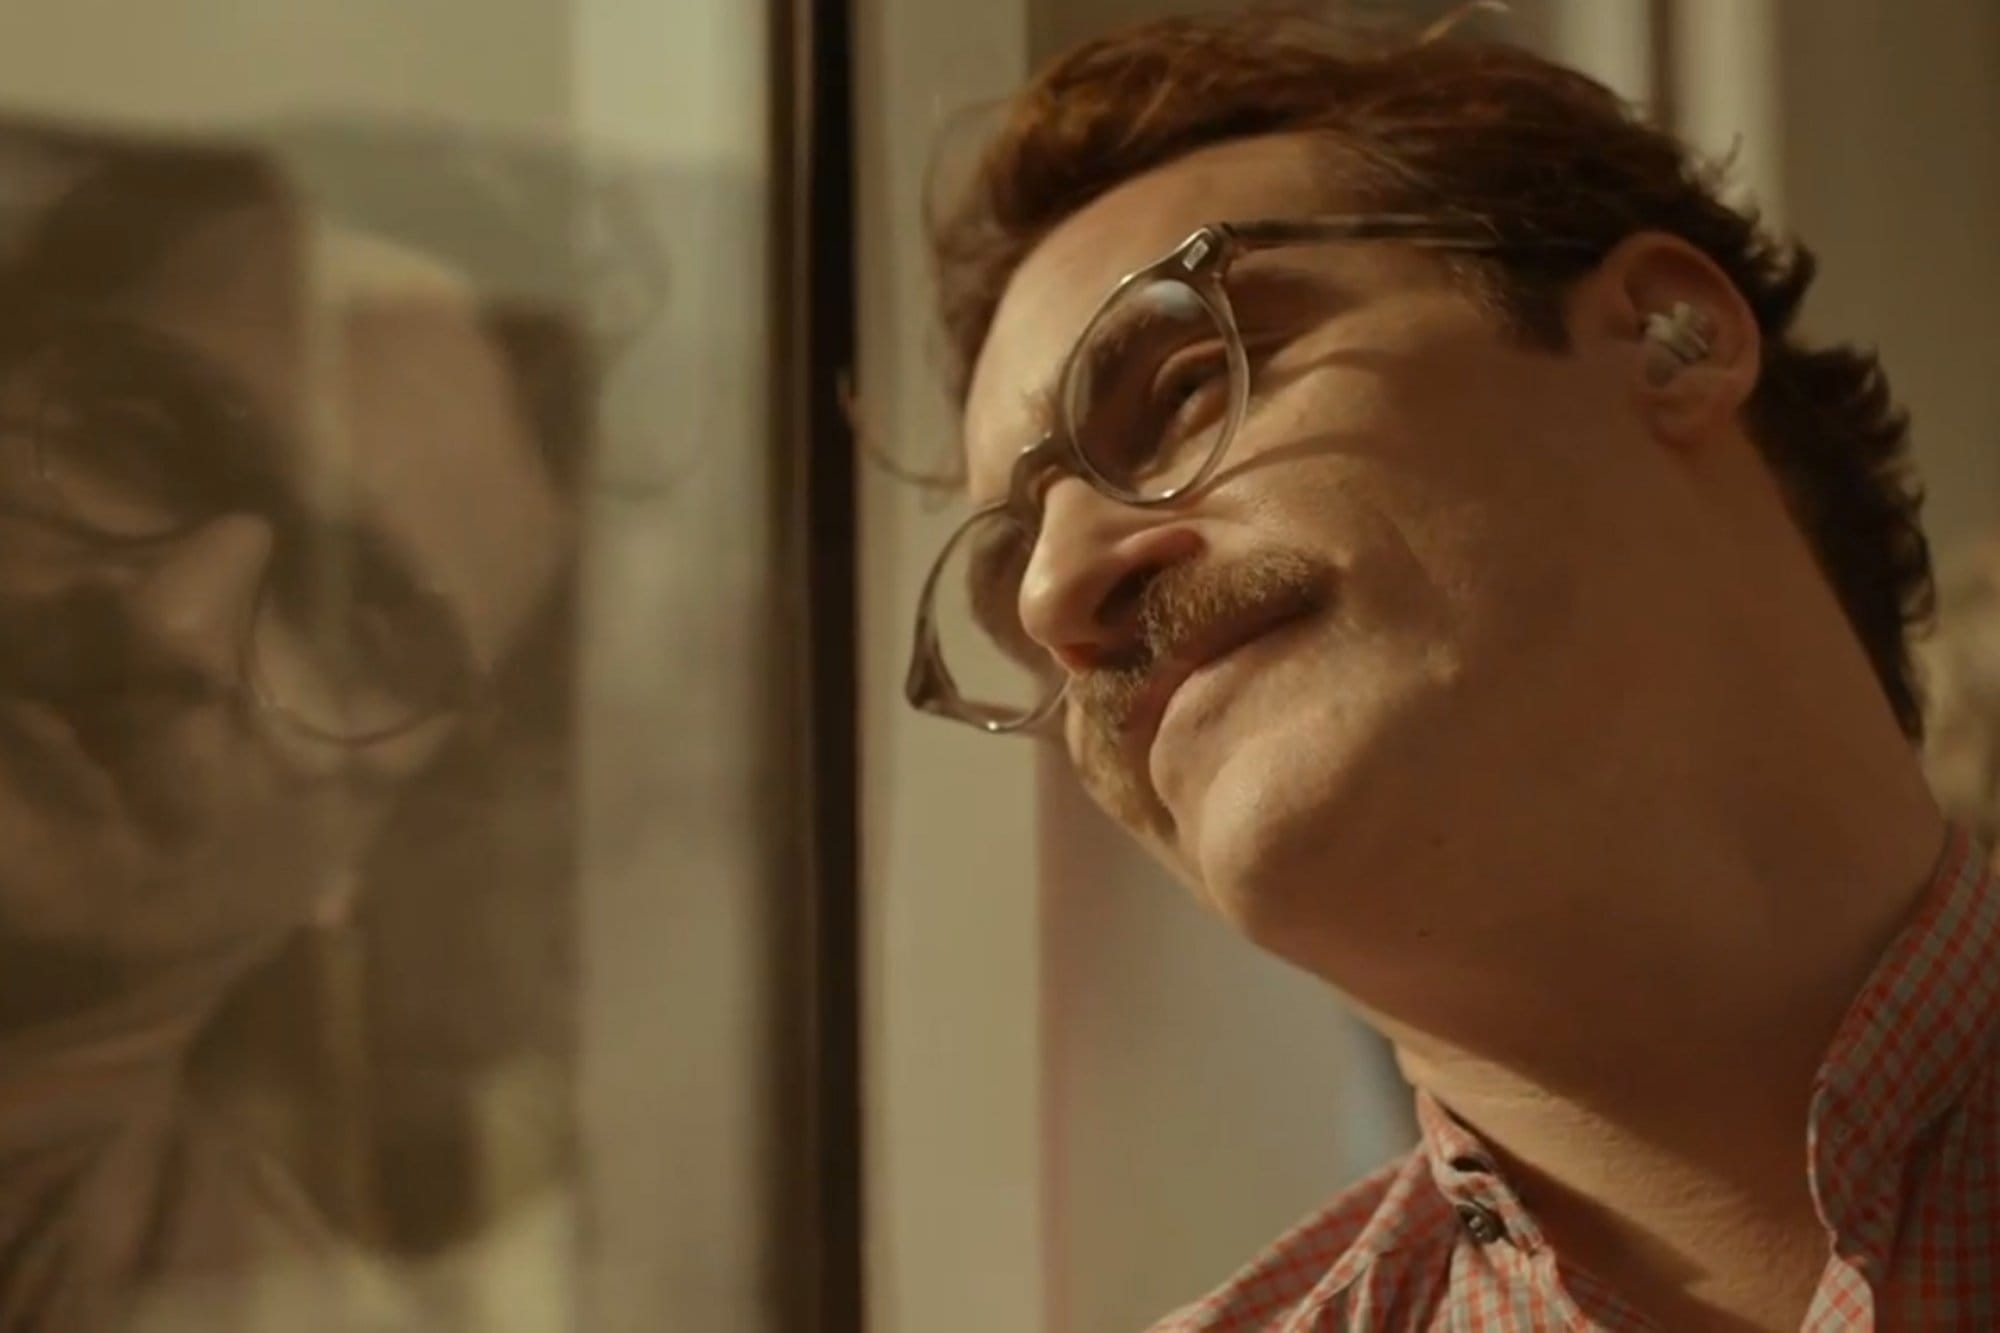
Image courtesy of Warner Bros
Hard light, like sidelight, is for when you want to create more drama, suspense, or intensity in a scene.
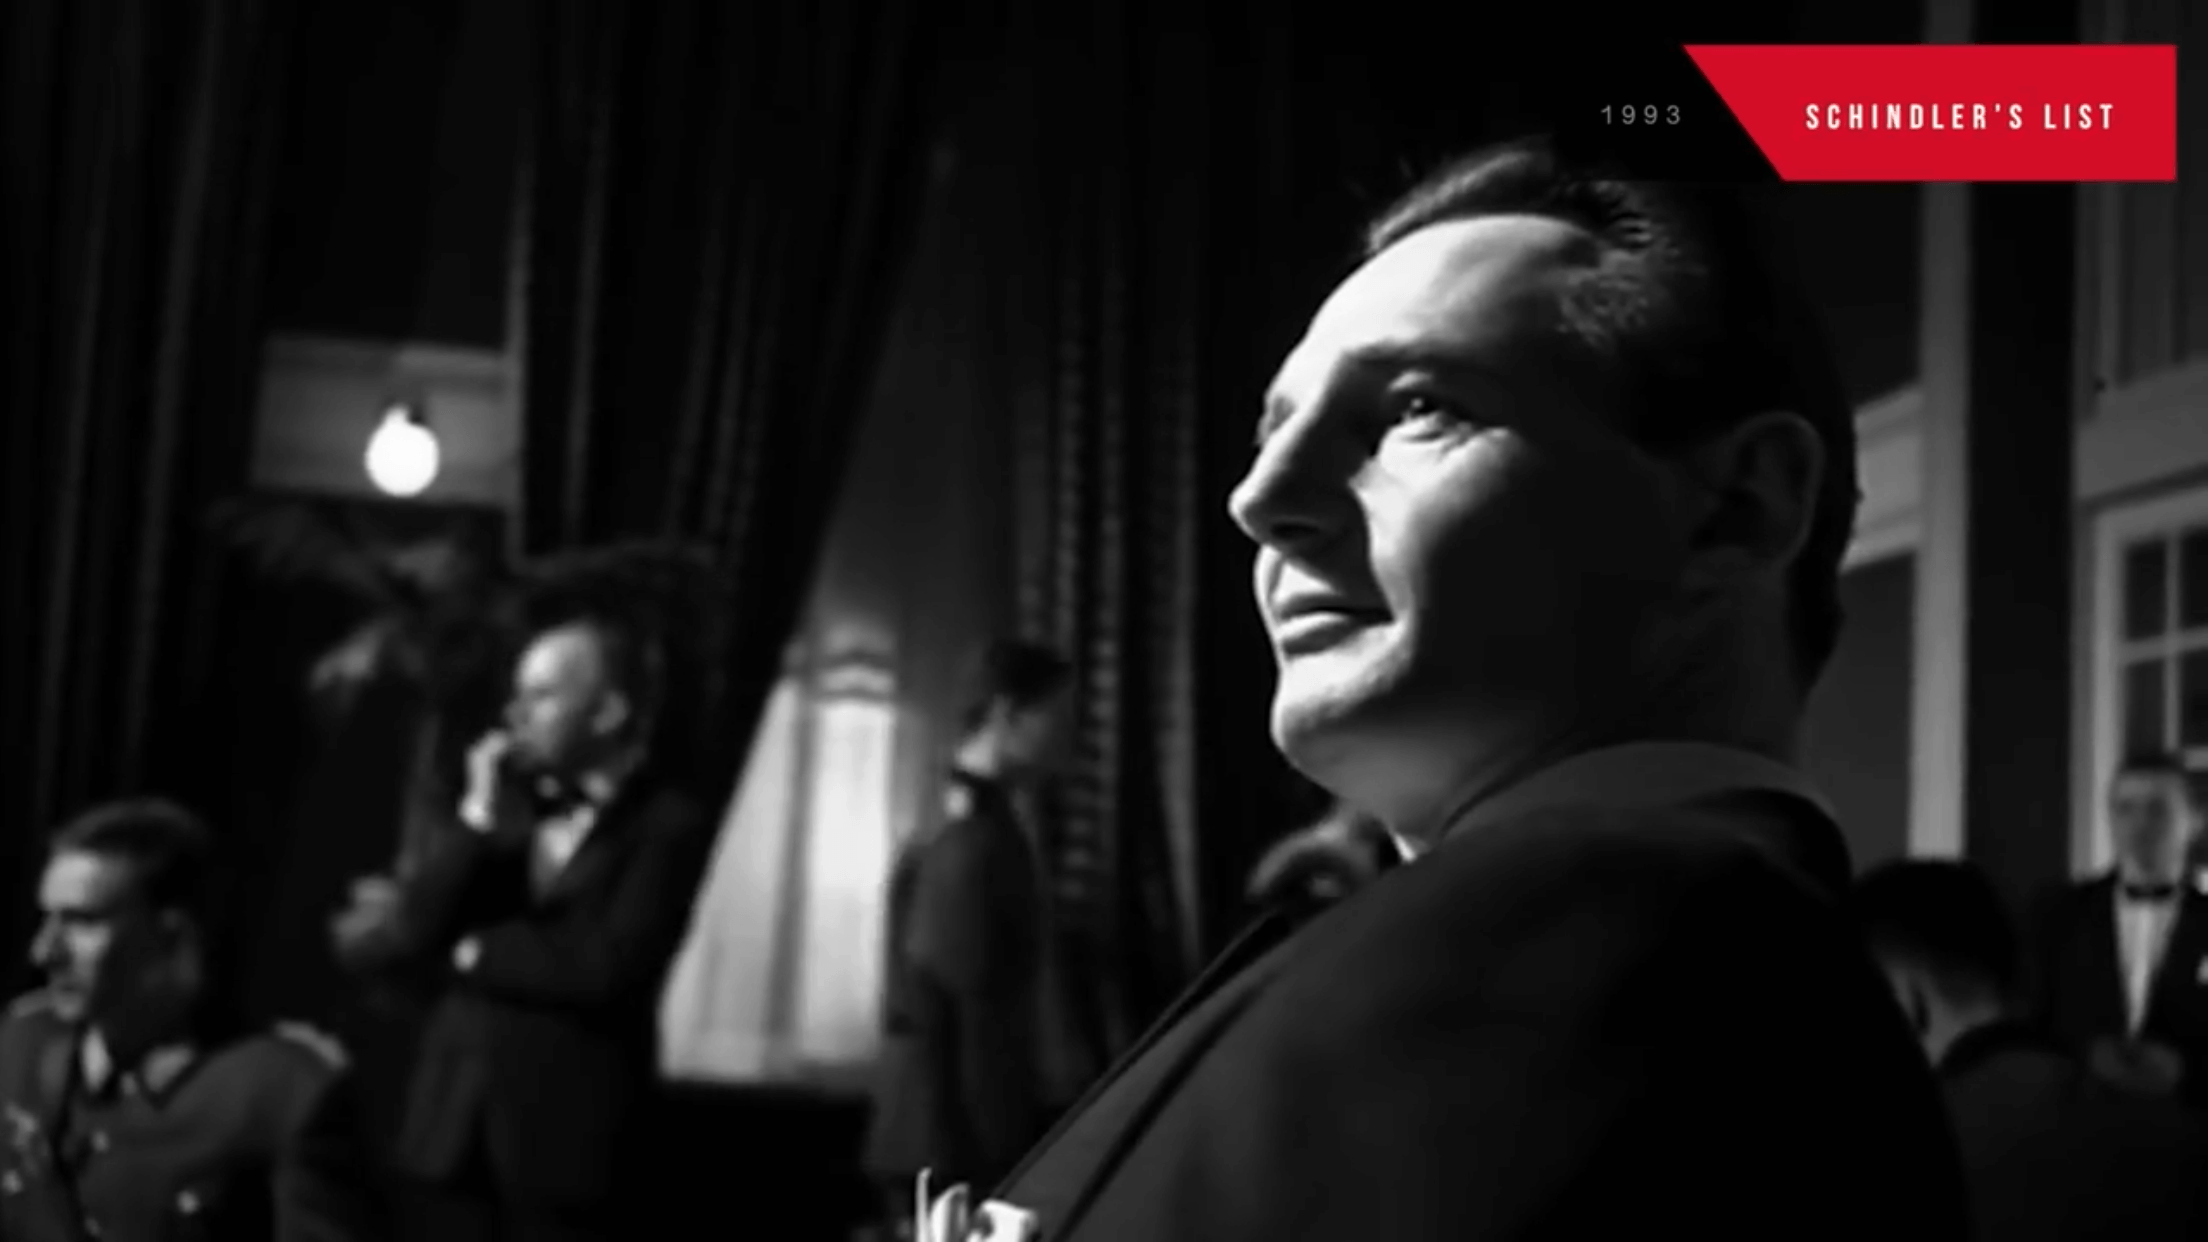
Image courtesy of TopsImages
Motivated lighting is the act of simulating or more commonly, enhancing light sources.
For example, placing artificial lighting outside of windows on a set is a way to simulate or enhance natural light.
The same goes for practical lighting, if you think about things like candles or lanterns, they don’t give out enough light to properly illuminate a frame.
So, unknown to the audience, they are usually given a helping hand from some artificial light.
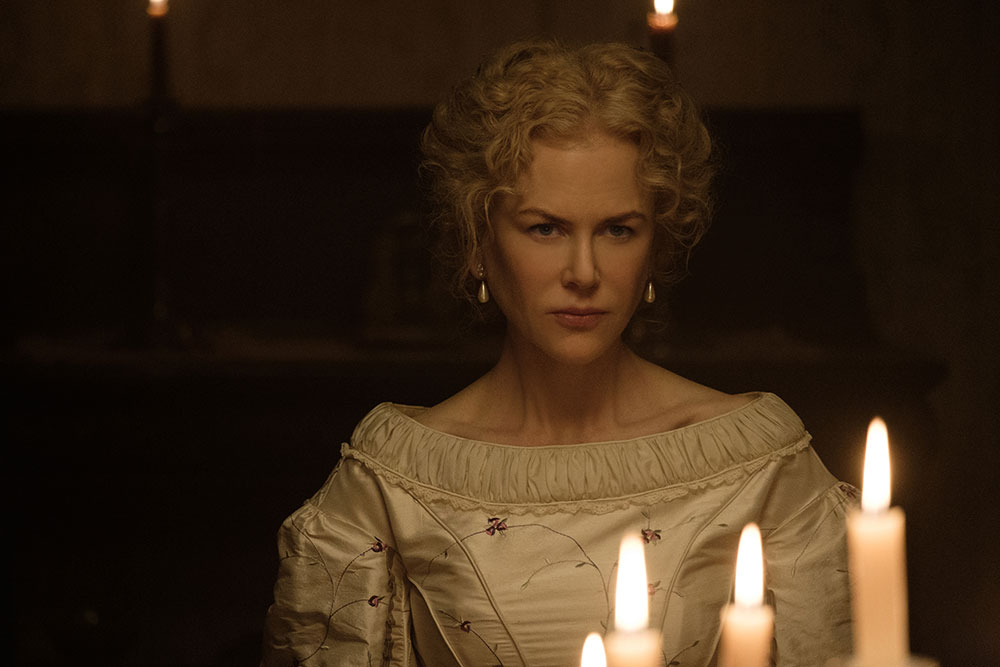
Image courtesy of Focus Features
The trick here is to make sure the artificial light in your shot looks like it’s coming from the source it’s enhancing.
Kicker lighting is a very simple but effective technique where the backlight is positioned so that it’s prominent on the edge of the subject’s face on one side.
This creates a rim or outline of bright light when combined with low fill light and it’s a really powerful effect if used correctly.
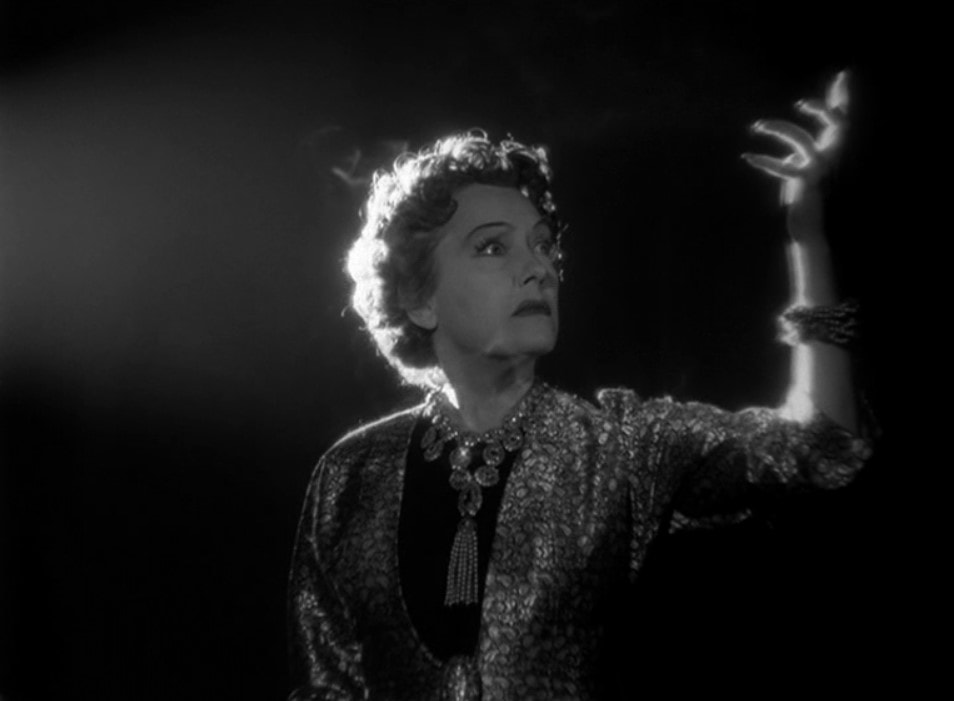
Image courtesy of Katherine Wickoff
Those are some great examples of light that you can add to your video but remember you can also take advantage of any lighting in your location.
Things like street lights, storefront lights, neon signs, car lights, and of course sunlight can all be wonderfully effective.
Keep in mind that working with natural light can be every bit as frustrating as it is rewarding due to its unpredictability.
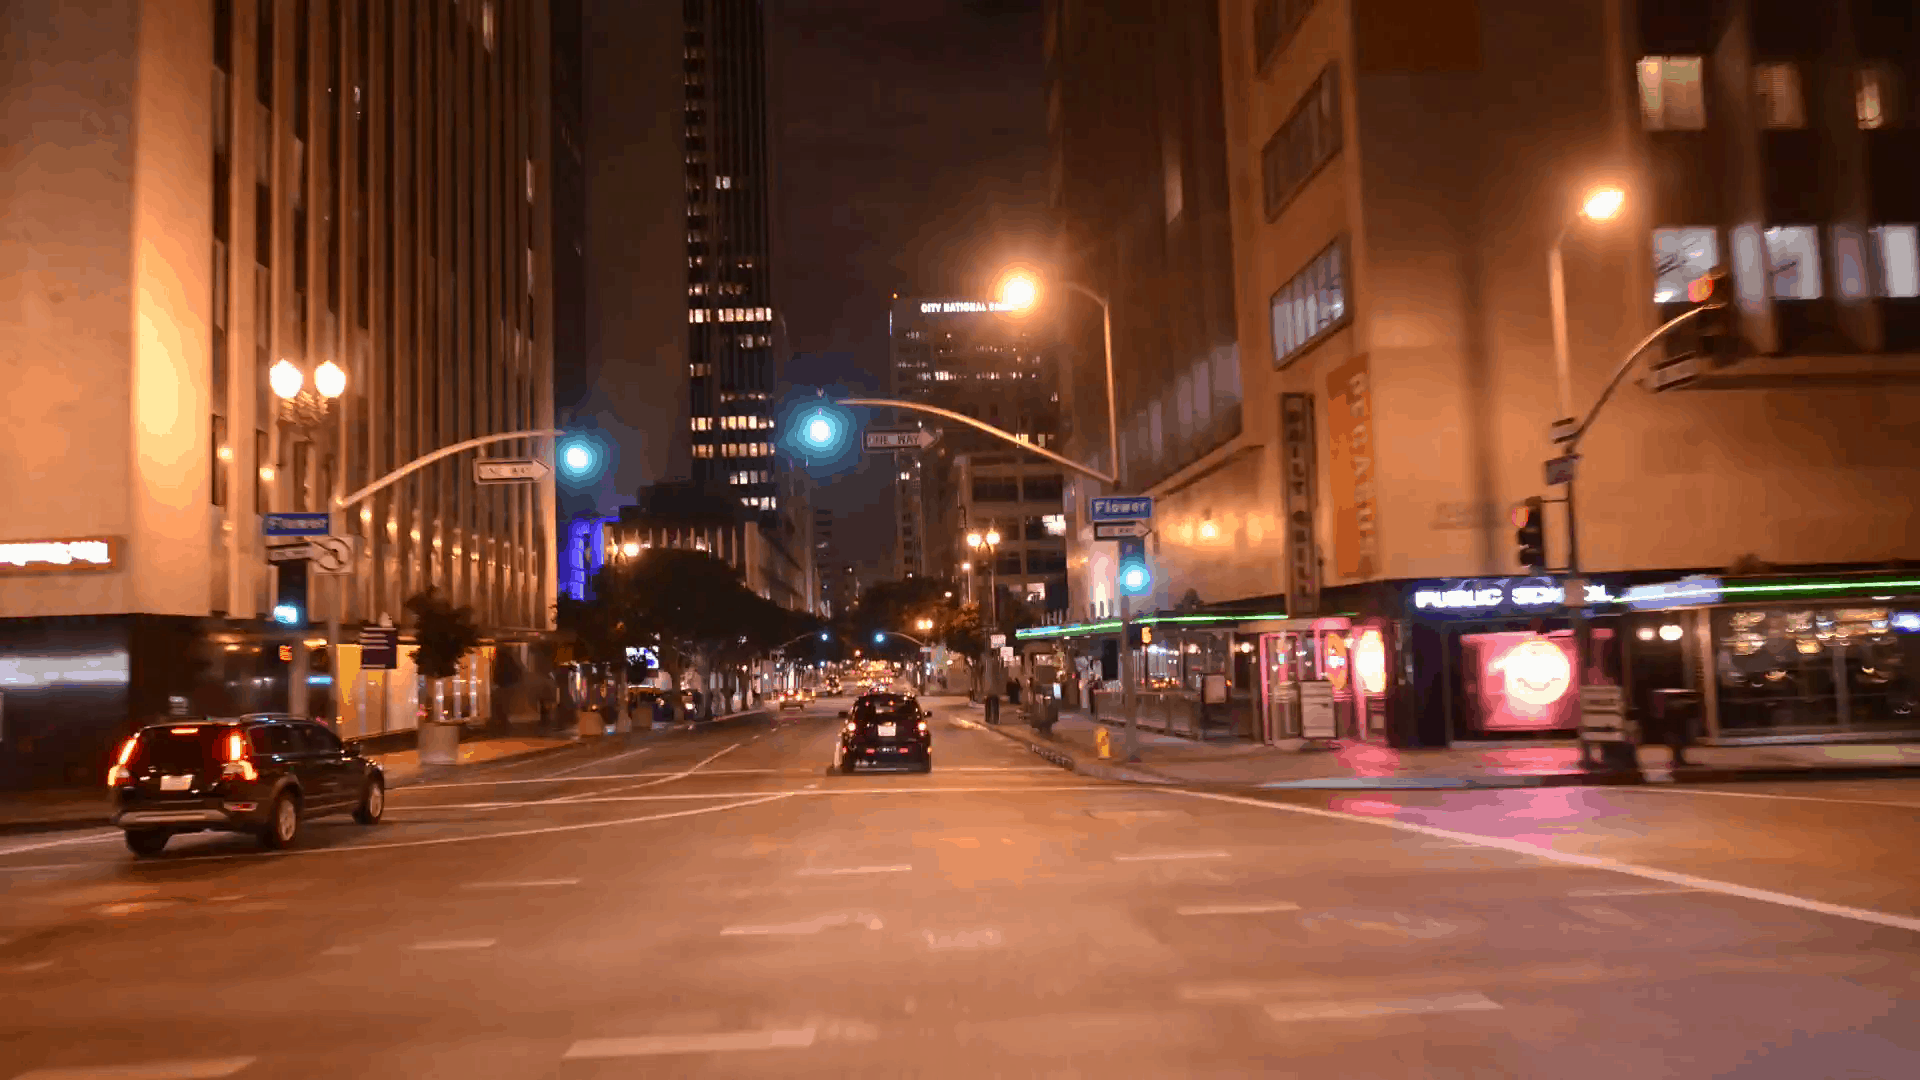
Image courtesy of VideoBlocks
So, we hope we have given you some food for thought and even some inspiration.
The biggest piece of advice we can give you is to know the basics. we can’t stress that enough!
Don’t try to get too creative before you are fundamentally sound, it will save you countless headaches down the line.
After nailing your lighting to set the right mood, all that’s left is finding the perfect music score to complement it and you’re on your way!


| 00:00 / 00:00 | | $0 |